

Not our North American Version
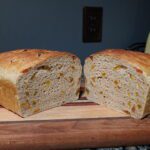
In North America, traditional cinnamon raisin bread is a sweet bread with a cinnamon swirl in it. This bread is different. This bread is more like a dense white loaf of bread with raisins throughout and a hint of cinnamon flavour.
Cinnamon Raisin Bread
Ingredients
- 370 Grams Whole Milk Warmed to 110°F
- 1 Tbsp Honey
- 10 Grams Active dry yeast
- 440-480 Grams All-Purpose Flour
- 1 ¼ Tsp Kosher Salt
- 170 Grams Raisins
- 2 Tsp Cinnamon
Instructions
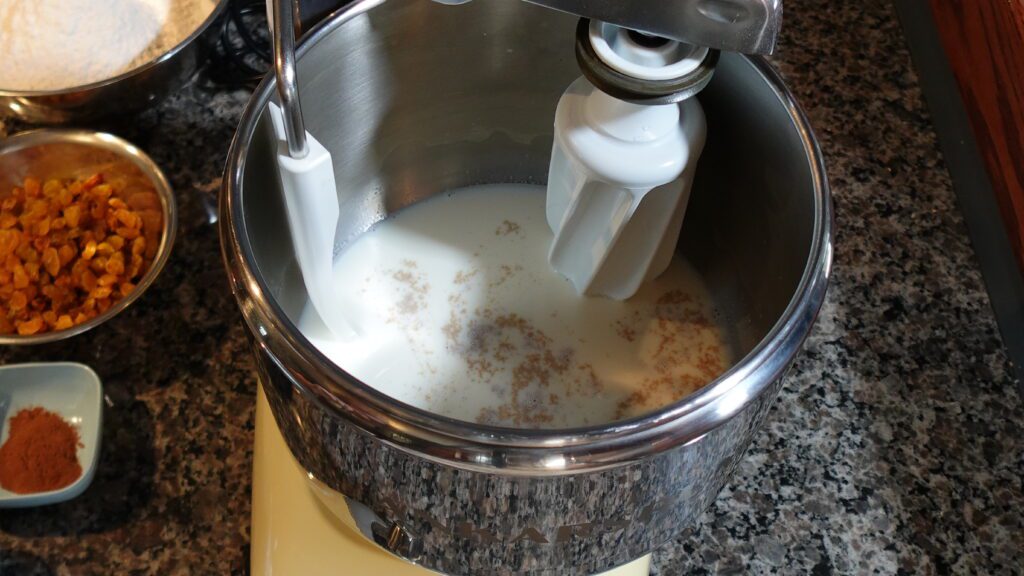
- Warm the milk to around 110°F.
- Add the warm milk to the bowl of your stand mixer.
- Add the honey and stir to combine.
- Sprinkle the active yeast on the milk and honey mixture and allow to proof for approximately 10 minutes. You want to see the yeast bubbling to make sure it's alive and ready for the next steps.
- Once the yeast is ready, turn on your mixer and add half the flour and salt.
- Add the raisins and cinnamon and add more flour. Keep kneading the dough and add more flour if necessary. You want the dough to clear the sides of the bowl but still be a bit sticky. You may not need all the flour. With my mixer, I usually knead the dough for 4 minutes at a slow speed.
- Cover the bowl and allow the dough to rise until double in size; approximately 1 hour.
- After the dough has doubled in size, lightly grease your hands and a clean work surface. Flatten the dough into a rectangle shape and starting at the long end, roll the dough into a log.
- Cover the loaf and allow to rise until double in size again; approximately 1 hour.
- Preheat the oven to 425°F. See notes below for adding steam to the loaf when baking.
- After the loaf has risen, bake in the oven for 20-25 minutes. I start to check my loaf after 20 minutes and 22 minutes is the usual time for me.
- Allow the loaf to cool completely on a wire rack before serving.
Notes
Some photos and a video to help you bake this bread
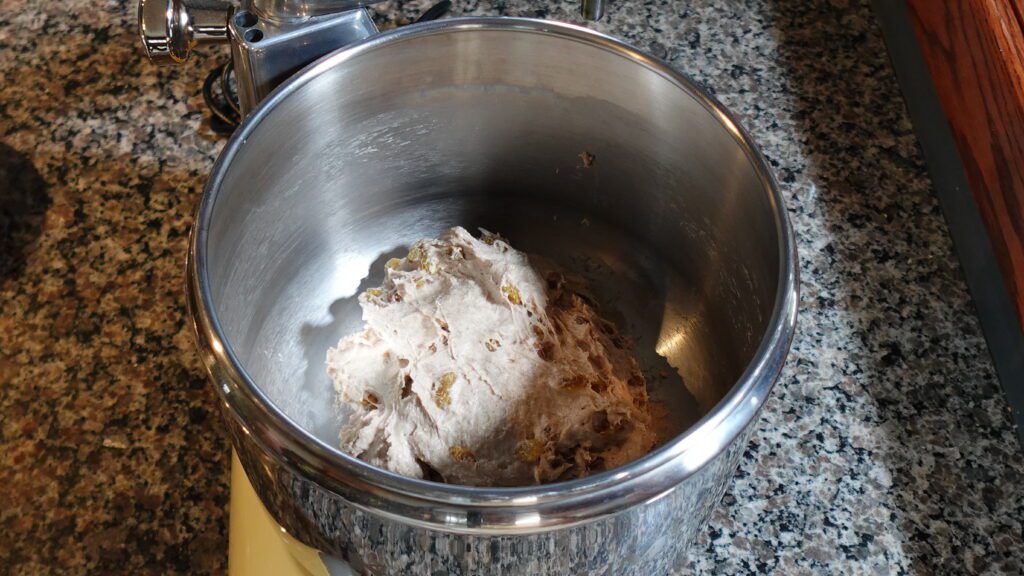
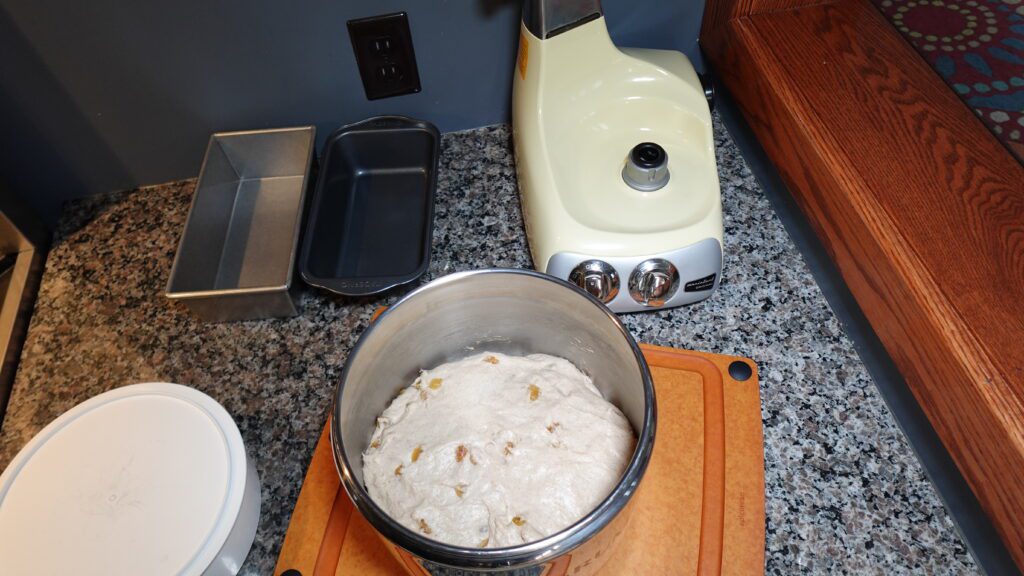
The dough should be slightly sticky still but cleared from the sides of the bowl.

After the dough has risen in the bowl, use a little bit of oil and shape the dough into a loaf pan.
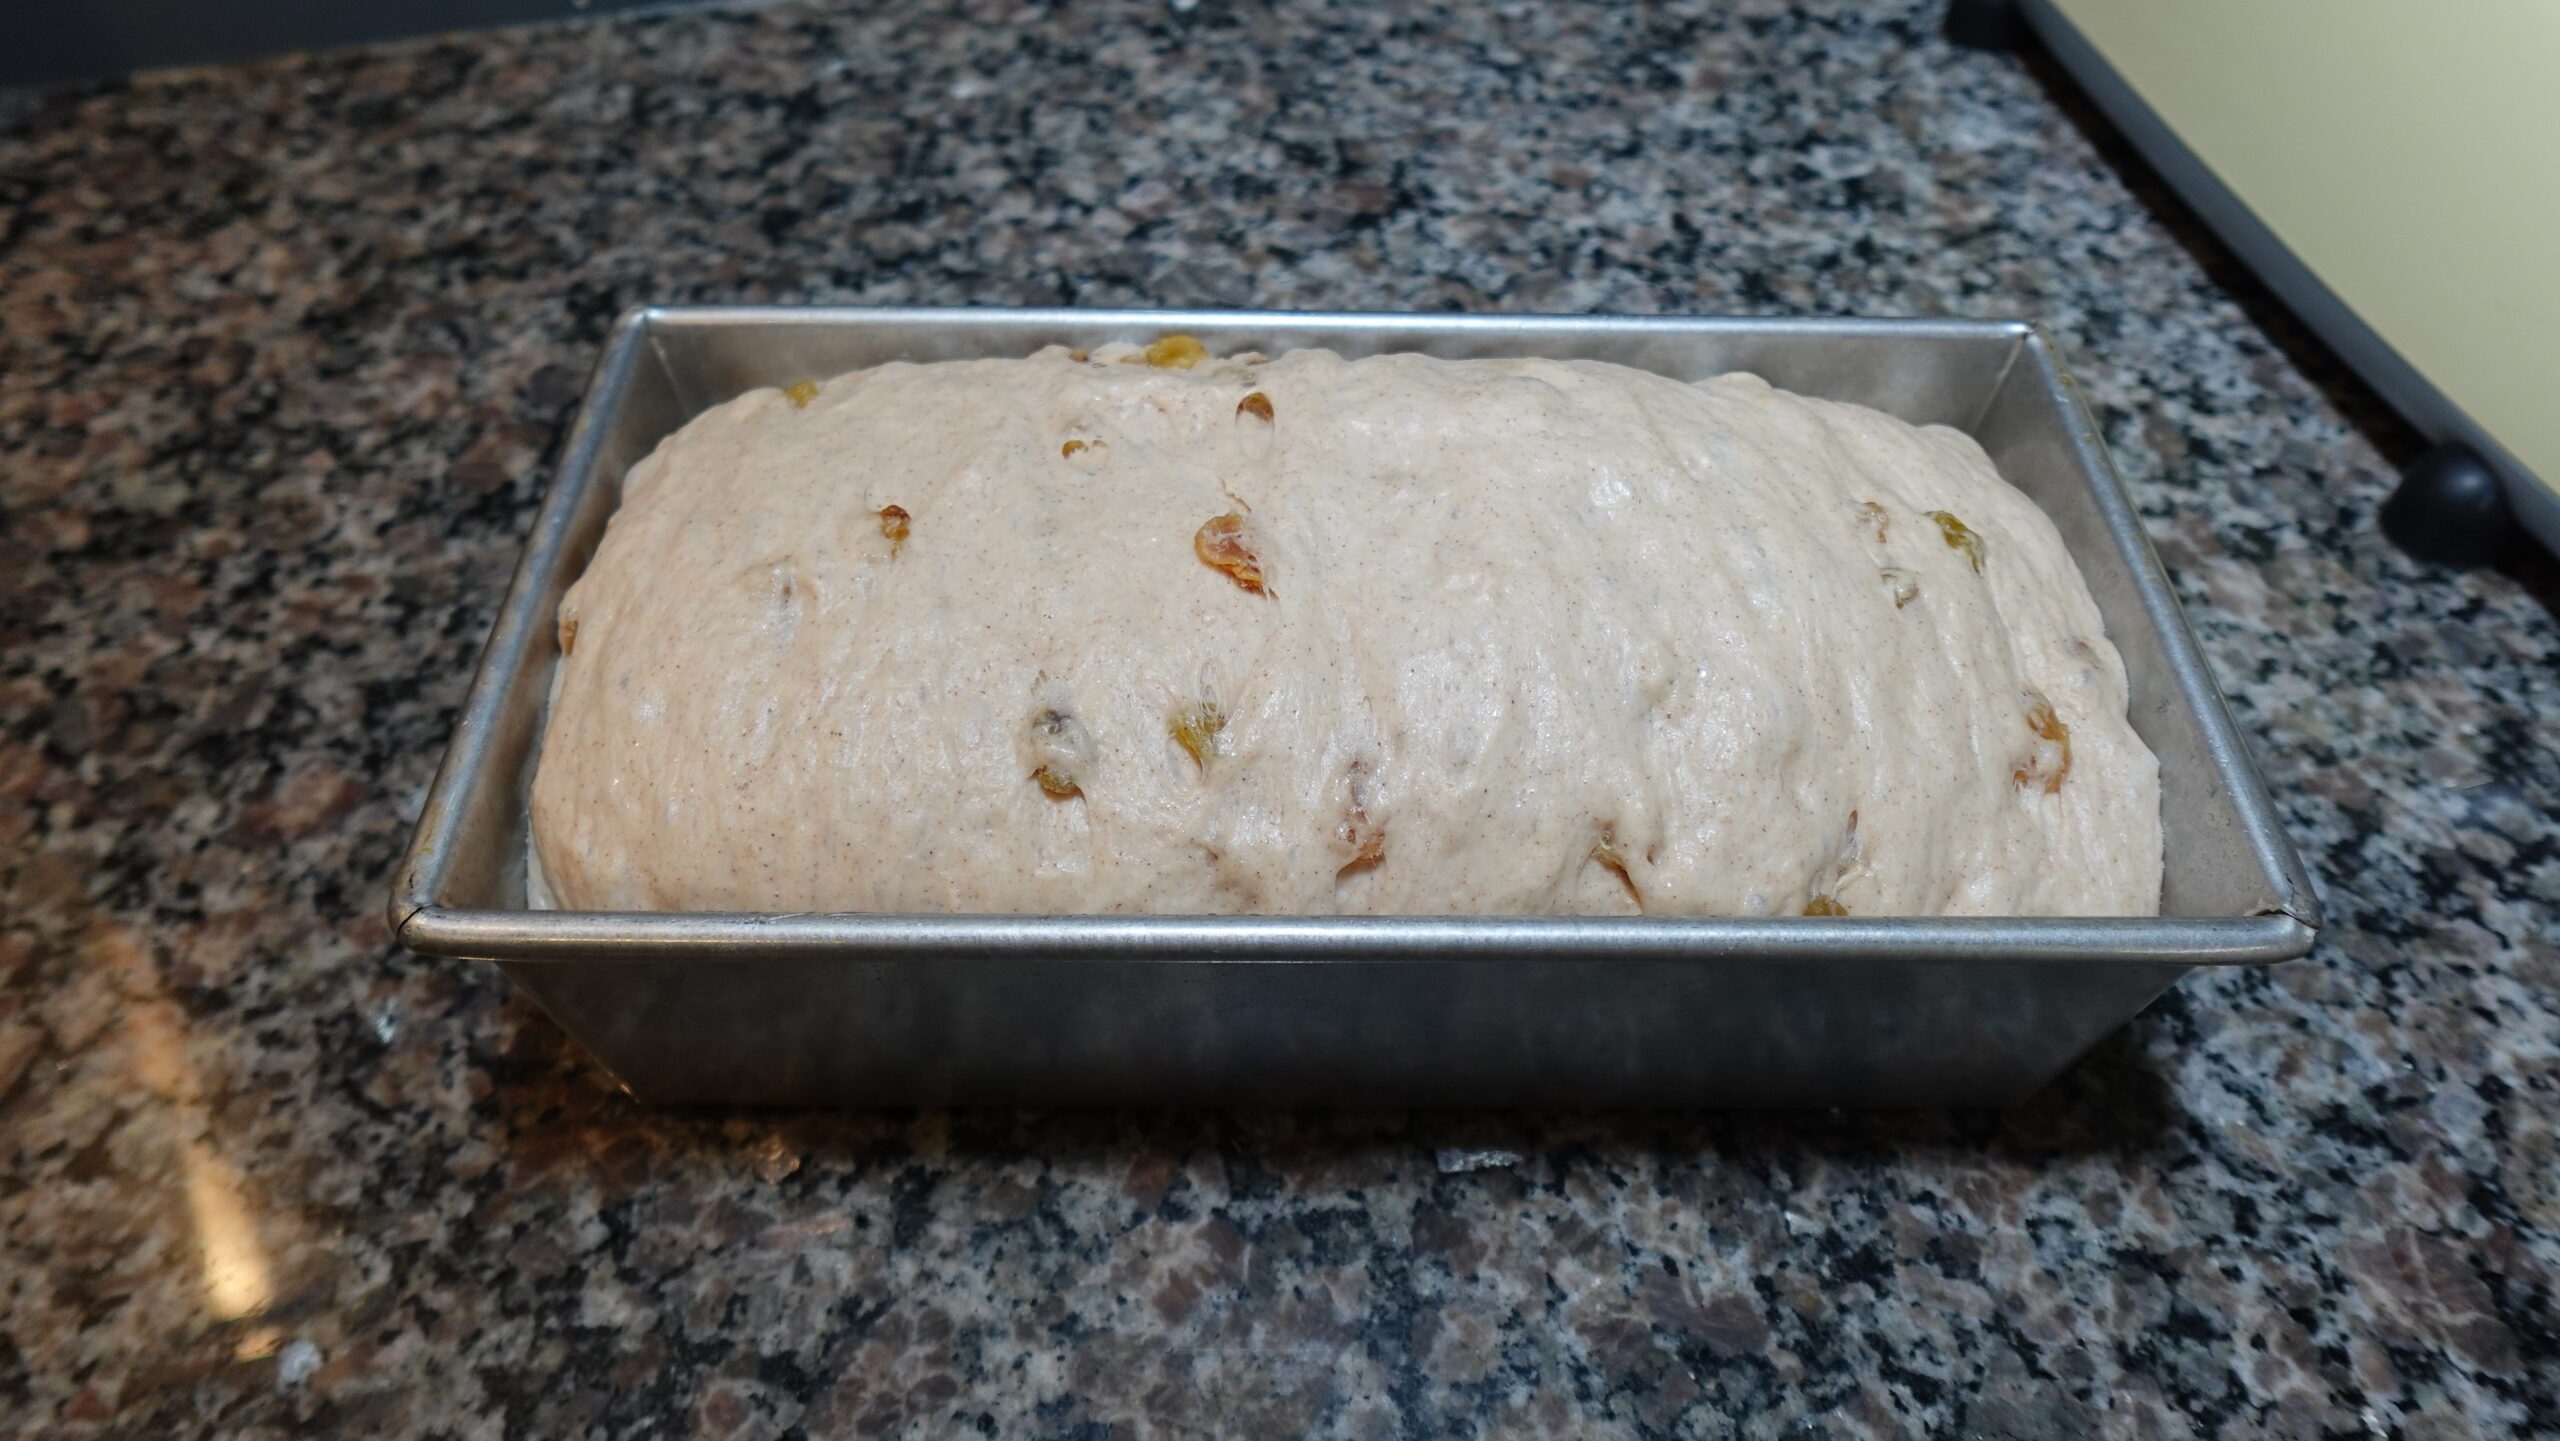
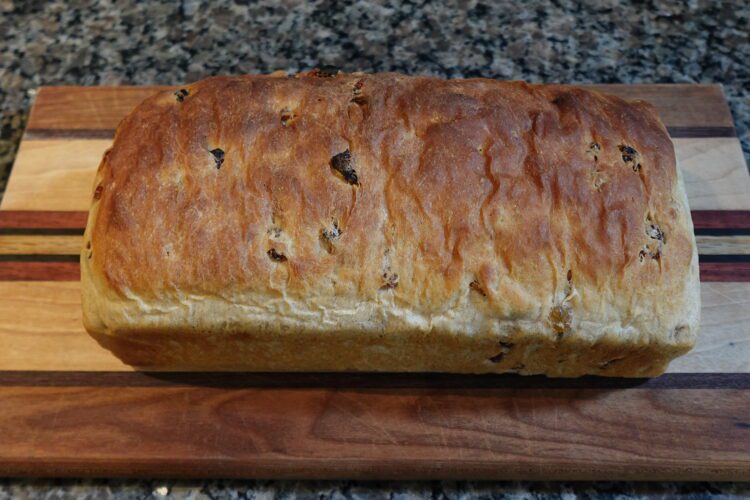
This is the loaf after the second rise and ready for the oven. Doesn’t it look amazing!
The Results of Cinnamon Raisin Bread

This cinnamon raisin bread is amazing with some butter. Although it’s not like a traditional North American cinnamon raisin bread, I really think you will like it.
I like this as it’s not a sweet loaf of bread. It’s dense and the raisins and cinnamon are spread throughout the loaf. Don’t get me wrong, I do enjoy the other version and I make it as well. This is just different. Be sure to subscribe to my newsletter so you will be notified when I release that recipe.
Looking for a different bread recipe? Try this sourdough bread.

If you do try this recipe, I would love to see your results. Be sure to tag me on Instagram @heidiswhatsburning.ca